
Neo Geo Control Panel for Big Red Cabinet Restoration
 Since I have zero welding experience and also no way to know exactly what the measurements of the shelf was, I began a search for a replacement control panel. For the first couple of days, I started regretting ever getting into this project because I was seeing these control panels popping up on eBay for over $200 and none of them had the memory card shelf or any wiring!
Not more than a week after picking up the cabinet, I found a complete control panel with the shelf, the memory card reader and all wires, buttons and joysticks on eBay. I ended up winning the item for about $150 with free shipping. So in one fell swoop I was able to get a control panel with the welded-on shelf and the memory card reader which I was pricing at around $100 by itself! As a cherry on top, I got a second complete wiring set and to my surprise, the seller included the entire cabinet wiring loom so now I have some spare parts.
Project Goals
- Strip paint
- Remove rust, dirt and gunk
- Powder coat entire panel flat black
- Install brand new control panel overlay
- Install new IL buttons and Sanwa joysticks
Neo Geo Control Panel Restoration Begins
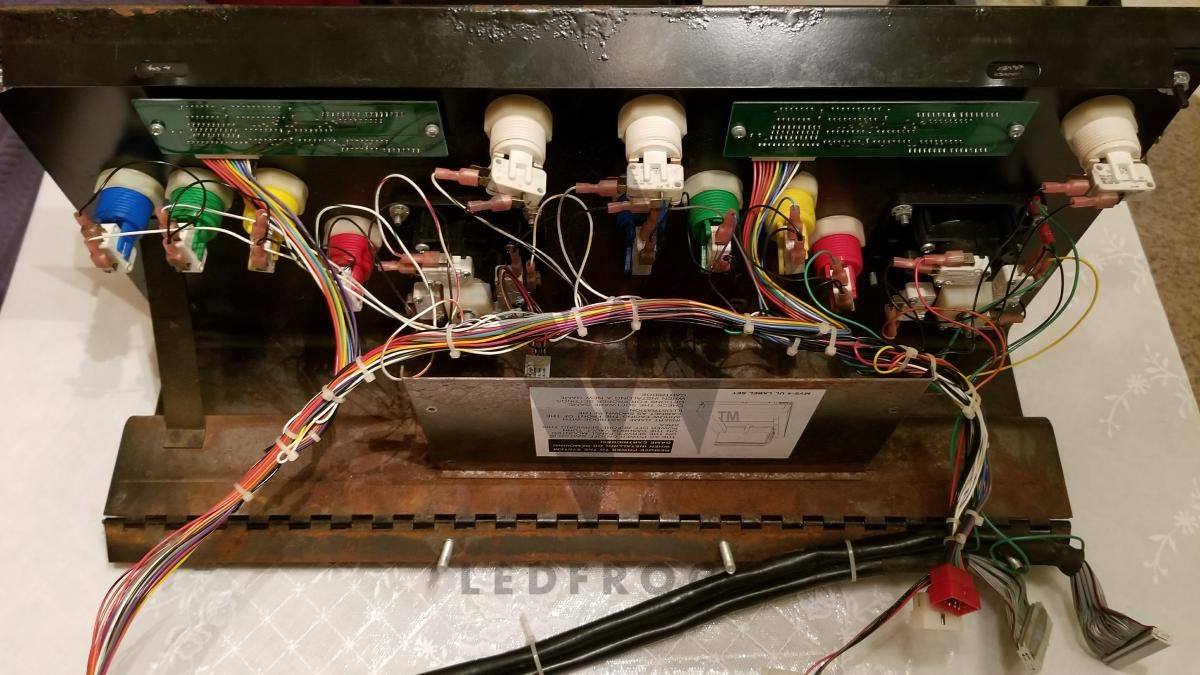
The biggest problem with this control panel was no doubt the amount of rust, dirt and debris it has acquired over the years. I didn’t bother asking the seller what had happened to this unit, but it looks like it’s seen some pretty heavy use and the memory card reader was probably never used at all as it was literally filled with dirt and other gunk. Fortunately, none of the pins were bent and the muck appeared to be just that. A pretty straightforward wipe down with paper towels and isopropyl alcohol took care of that mess!
I also checked for any broken traces on the board and it looks like everything is good to go. I won’t actually know until I get everything up and running, but since it looks like this card reader is nothing more than just a basic pcb used to direct the pins to the motherboard we should be good. If you look on the photo of the cleaned MV-IC, you’ll see some dirty solder joints. I plan to resolder all of these points just to have cleaner contacts.


Paint Stripping & Cleanup
To begin the removal of the black paint, I opted to go with Citristrip® Gel as I’ve heard many great things about it on various restoration forums and it has the added benefit of being non-caustic and non-toxic. Being in a gel form made it so much easier (although still messy) to work with since it can be “painted” on and then left to sit without running off. The instructions mentioned that results could be seen in as quickly as 30 minutes, but this proved to be untrue for this application. I decided to let it sit for 24 hours to see what kind of progress I could achieve.
Sadly, the only portions of paint that started to bubble up were areas that had rust development underneath and also a few areas around the edges. I ended up removing what I could and then hitting the panel with some steel grinding wheels. The paint was still difficult to remove and it appeared as thought there were multiple layers. I gave the Citristrip® another chance, but this time letting it sit for almost 48 hours. I still didn’t get the results I was expecting. Either SNK did some amazing paint work on these units or Citristrip® sucks on certain applications!


A couple of days later, I picked up the control panel and to say that I was impressed was an understatement! There is no way in hell that I would have been able to pull off a job like this with paint! I mean other than some very minor defects in the metal itself, this control panel looks like it just came off the factory floor. Here are some pics of how it turned out:


Putting it all back together
The new Neo Geo control panel overlay is the one created by Quarter Arcade and I love that it’s thicker than the original which should make for some better protection over time. It’s also damn near close to the original in design. I say “damn near” because the only drawback is that the credit display window was slightly off when I applied it to my control panel. If I tried to move it over, then the joystick and button holes became slightly off. Fortunately since the control panel is black, you can’t really see the issue when everything is put back together.
I ended up sourcing the buttons and joysticks mostly from Focus Attack, but as you can see in the photos, I ended up with a more lime green color button which bothers the purist in me because the Neo Geo originally used a darker green color. When you see the final cabinet photos, you’ll see that I fixed the green button issue! For the joysticks, I went with the Sanwa JLF model because of its high ratings by many players, but I opted to switch out the standard spring with the heavier variant to make it feel more like an old school joystick. It’s still a lot lighter of a throw than what was originally on here, but I ended up liking the new feel and will keep them for now.
For the hardware, I found the original size carriage bolts on eBay and purchased the nuts and washers from Home Depot. I decided not to re-use the original bolts because of the amount of rust and gunk I would have had to clean off. I also didn’t want to paint the bolts black to bring back that “new” look, so getting dyed bolts was the only way to get the correct replacement.


stone April 29, 2020
Excellent job! Your cab will be amazing once complete. I am needing to do the same for my Big Red cab and control panel. Newbie question here: I had just purchased a Sanwa stick (JLF-TPRG-8BYT-SK) to replace the tired joystick currently mounted and am curious how to wire it. The JLF doesn’t have the same type of wire connections as the stock joystick. Is there some kind of harness available?
Brandon April 29, 2020
You could do what I did and put some .187 size spade connectors on the end of the wires. Then you’ll have to do a bit of trial and error to find out which wire goes to up, down, left and right as these might be different based on how you oriented the joystick. I’ll email you a photo of what I did.
Alejandro February 14, 2021
By any chance you are willing to sale your other set of memory card wires? hard trying to find some for my Big Red 4 slot. I have a reader which just like yours is pretty dirty. But no wires.
Brandon March 4, 2021
I’ll honestly have to see what I still have! I moved a while back and remember selling some of my old arcade stuff, but I don’t remember if I sold these or not. I check and get back to you.